
With this guide, you learn how to launch, connect, calibrate and execute sequences with Niryo. We will introduce you to Niryo One Studio visual programming interface (Niryo can also be programmed with Python, ROS, Matlab, C++).
Niryo One kit parts list
The Niryo One kit includes the following components:
- 1 Niryo One robotic arm (assembled)
- 1 Gripper 1 “Standard”
- 1 wall power supply (11.1V 6A, EU plug)
- 1 universal power plug adapter
- 4 feet
- 4 suction cups
- 1 set of tools (Phillips screwdriver, hex keys, 8 mm size open-end wrench)
Make sure that no part is missing before reading further. If you have any doubt, do not hesitate to contact us!
Mechanical Assembly
Niryo One is delivered fully assembled. Once received, all you have to do is attach the feet and the gripper to the robot.
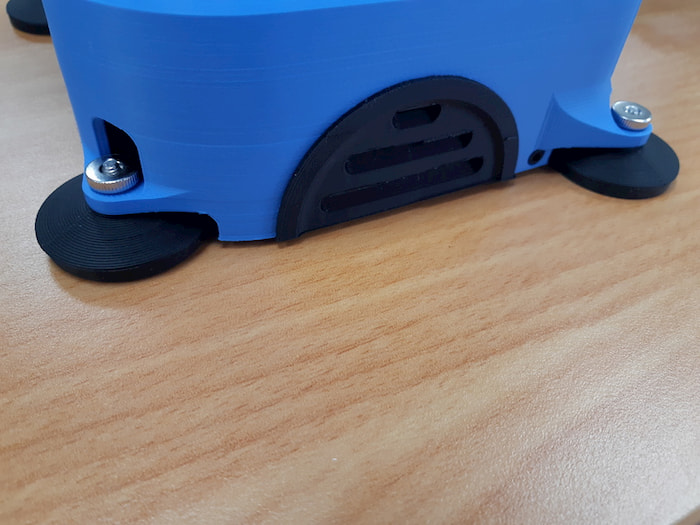
All four feet must be attached to the base of Niryo One to keep it steady. Each foot is held by a nut. Suction cups can replace the feet, which is better if you are not planning on moving the robot.
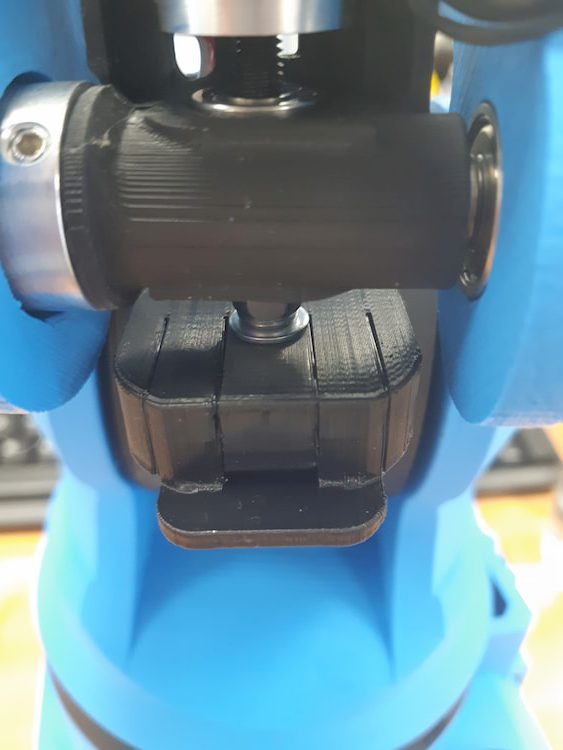
The Gripper 1 must also be set up. All you have to do is clip the gripper onto the notch at the end of the arm.
When using the notch for the first time, it might get stuck. If this happens, we recommend using a cutter knife to unlock it.
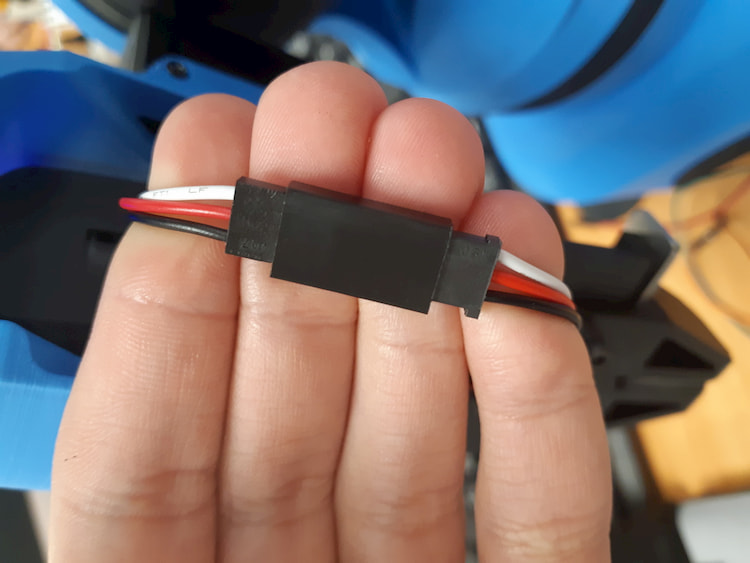
When connecting the Gripper, make sure that the 2 black wires are facing each other!
Connecting Niryo One to a computer
To get started with the Niryo One robot arm, it is recommended to install the logiciel Niryo One Studio desktop application. Niryo One Studio runs on Linux, Windows and MacOS and can be installed in French, English, German and Russian.
Before powering on the robot, make sure that the robot is on a flat and steady surface, and that it has enough space to move without hitting something or someone
Plug the 11,1V/6A power adapter that is supplied with the robot, then turn on the switch button. The LED on the back of the robot will become red. When the LED is blue or green, it means that the robot is fully started and you can start using it. This can take up to 20 seconds.
- Blue LED: Niryo One is fully started and in hotspot mode. Its IP address is 10.10.10.10
- Green LED: Nyrio One is fully started and connected to a WiFi network
In Niryo One Studio, you can display the WiFi connection panel by clicking on the gear icon.
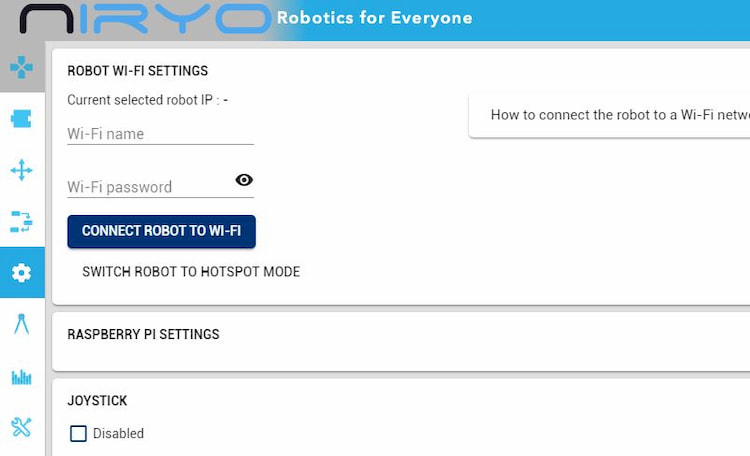
Connect to the WiFi network that start with “Niryo_One” (password: “niryoone”). This WiFi network is generated by the robot. You can also use an Ethernet cable to physically connect your robot to your computer.
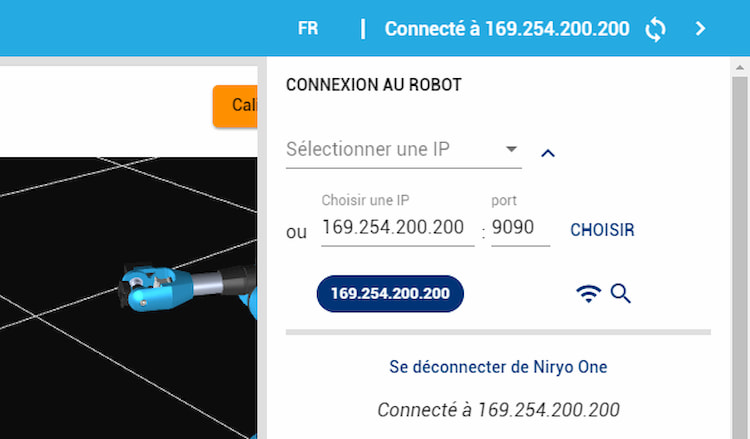
To connect the robot arm to a computer, simply click on the < icon at the top-right the Niryo One Studio interface to open the connection panel. The IP address must be 169.254.200.200 (leave the port on 9090).
Niryo One robot arm calibration
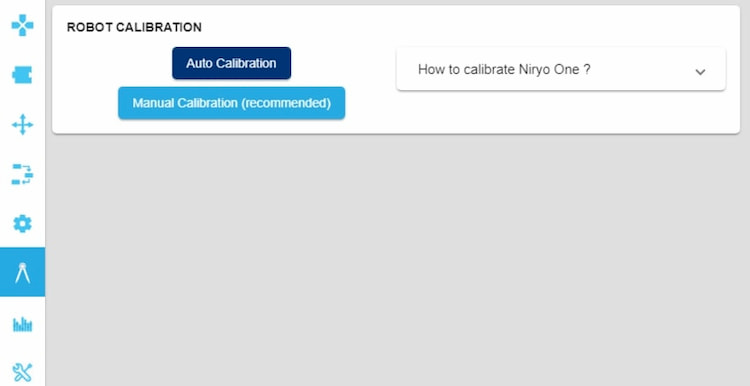
After the robot has been successfully launched, you will need to calibrate the motors. Click on the sixth tab (compass icon) to calibrate the motors manually or automatically. The first time that you will lauche the Niryo robot arm, you will need to pick the automatic calibration.
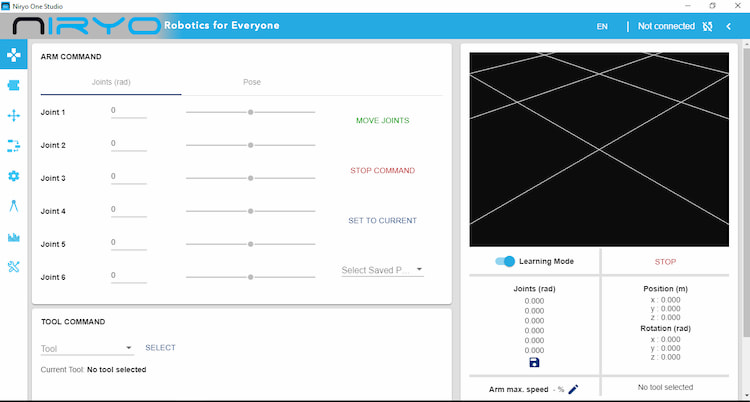
Once the calibration is done, click on the first tab to open the robot control panel (arm command). Use the slider control, corresponding to the “joint” of your choice and drag it to the right or left, then click on “Move joints”. The arm will move until it reaches the indicated position.
First moves with Niryo One
We recommend that you first make small movements in order to familiarize yourself with the orientation of the rotating axis and the robot arm speed.
To use the tool mounted on the robot (here, the gripper 1), go to the “tool command” section, which can be found under the “Arm command” tab you have just been using.
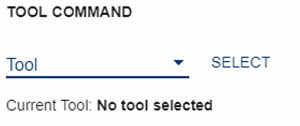
Select the tool you set up on the arm, and click on “Select”. Drag the slider control, corresponding to the “Open”/ “Close” commands to create the instruction, then click on “Open” or “Close” to launch it.
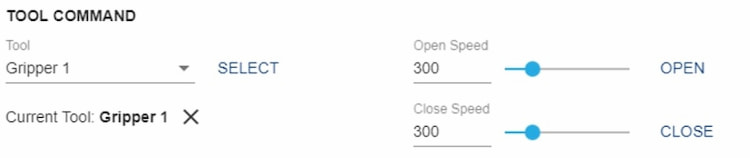
The slider controls the gripper opening and closing speed.
Programing the robot with Niryo One Studio
Niryo One Studio includes a Blockly-like visual programming interface so that real beginners can program the robot arm. You won’t need any coding skills to program Niryo One here!
This interface can also be used to record different positions in space and create movements sequences.
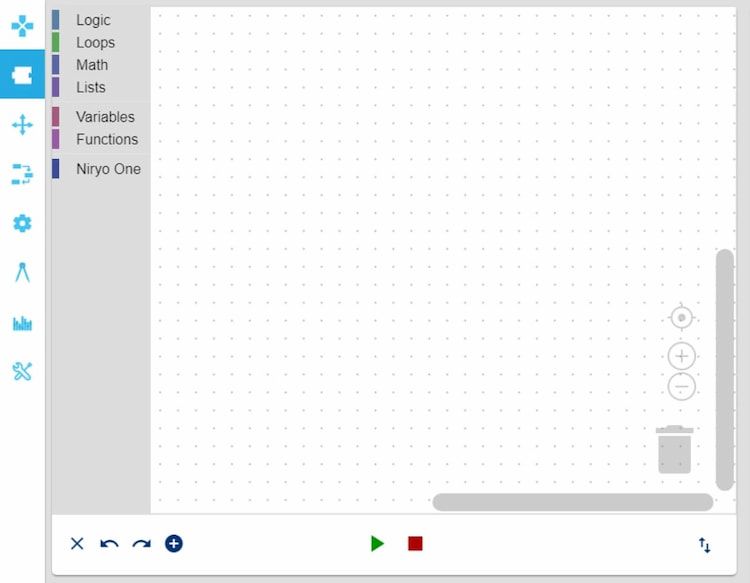
To access the block programming interface, click on the second tab. To create a program, use any of the Niryo One specific blocks (logic, loops, variables, etc.). Drag them to the workspace and assemble them in the order you want to create a sequence (like in Scratch or Blockly).
Click on the green button to launch the program, and on the green button to stop it.
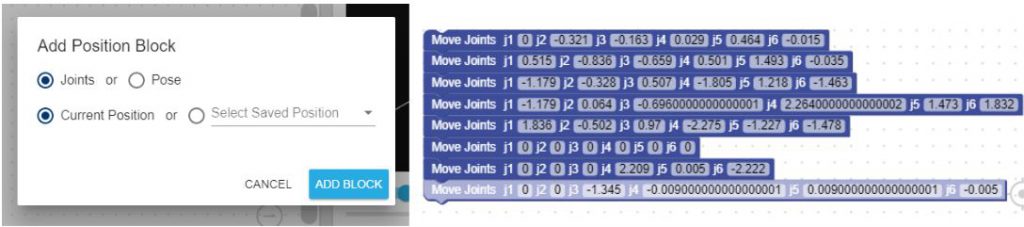
If you click on “+”, then “ADD BLOCK”, you will create a position block (choose the current robot state, or a previously saved position).
By using this command several times and by connecting the blocks together, you can create a series of positions that the robot will execute.
Connecting Niryo One to a WiFi network (connect several robots to one single computer)
It is possible connect the Niryo robot to an already existing WiFi network. This way, you will be able to control multiple robots with a single computer.
To do this, go to the fourth tab (the one with the gear icon) and type in your WiFi name and password.
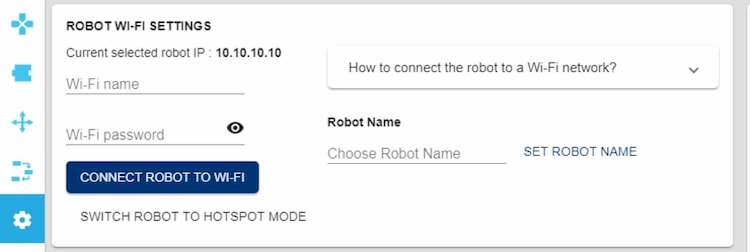
If the robot is successfully connected to the WiFi network, the LED will turn green. Connect your computer to the same WiFi network as the robot.
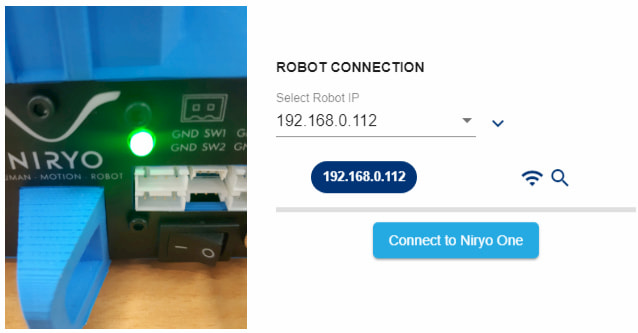
Once this is done, open the WiFi connection panel and click on the Magnifying-Glass icon. This will search for connected robots inside the current WiFi network.
Once your robot is found, enter its IP address and connect to it.
Overview of the other tabs in Niryo One studio
The third tab allows you to create a new position from the current robot state.

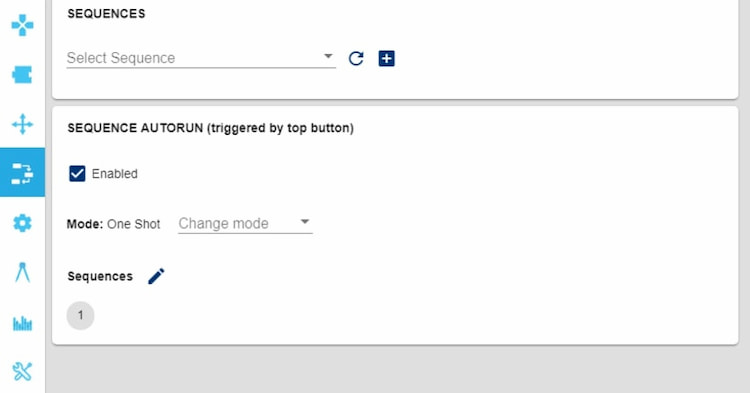
The fourth tab lists your saved sequences. You will also find here the sequence autorun, a functionality that executes a set of sequences, when pressing and releasing the robot arm top button.
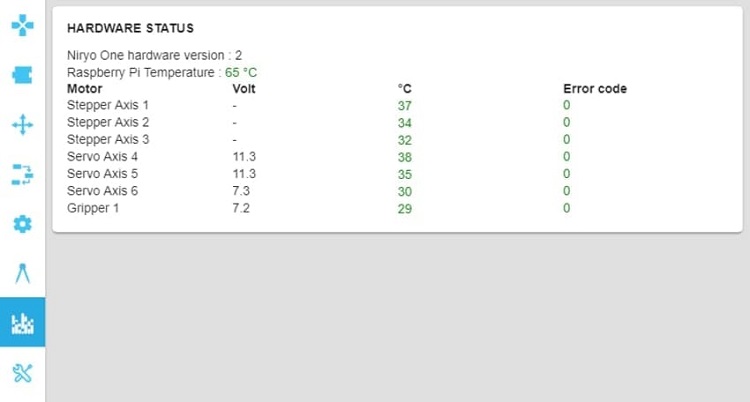
In the last two tabs, you will be able to check the motors status and look at the control board. All the logs are also saved there.
Shutting down Niryo One
To shut down the robot, press the top button and wait for the LED to turn purple.
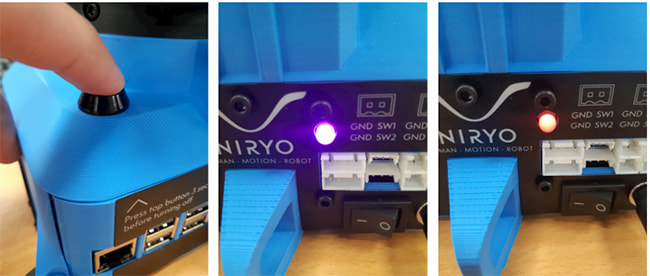
Once the LED is purple, you can release the button. Then, wait that the LED becomes red. Once the LED turns red, it means that you can safely switch off the robot and unplug the power adapter.
More tools for Niryo One
In addition to the Gripper 1 included in the Niryo robot kit, four tools are available for the Niryo robot arm:
- The Gripper 2 “Large”
- The Gripper 3 “Adaptative”
- The electromagnet
- The vacuum pump
The grippers 2 and 3 work the same way as the gripper 1, the electromagnet and the vacuum pump have some special features.
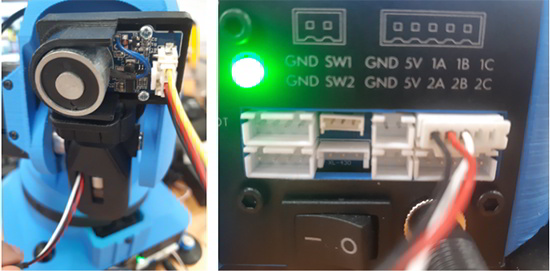
The electromagnet can easily grasp small metal parts. Unlike Gripper tools, it is plugged at the base of the arm, to one of the two connectors on the right. When choosing the tool on Niryo One Studio, it is important to indicate to which connector it is plugged to. The cable below is plugged to the 1A (GPIO2) connector.
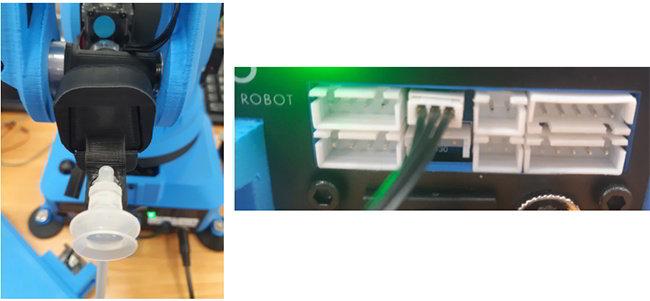
The vacuum pump allows your robot to pick and place items with a suction cup. Just like the electromagnet, it must be connected to the arm’s base. It has a dedicated connector.
Online resources for Niryo One
These resources will be useful to help you go further with Niryo One:
- The comprehensive user guide for Niryo One
- Structural parts STL files
- La API Python documentation for Niryo One