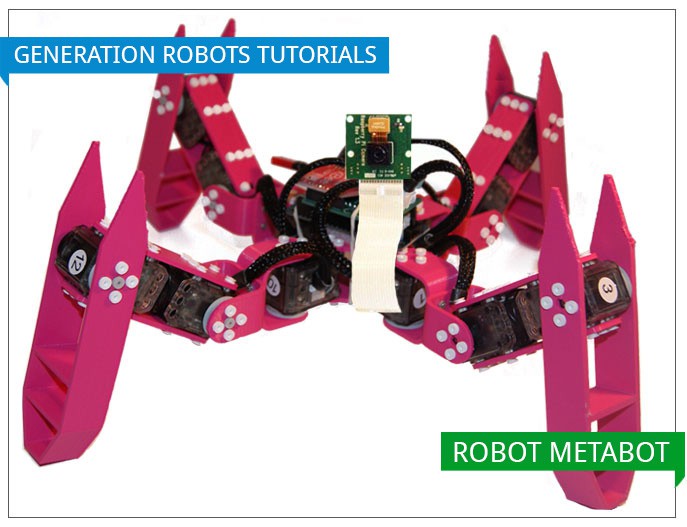
In this first Metabot tutorial, we are going to show you how to customise your legged robot by adding a camera module which will deliver a video stream. That way, you will be able to see through your Metabot’s eyes!
List of the necessary components for this project
Here is the list of the different components you will need to gather in order to get started with this project:
- A Metabot (assembled and complete)
- An OpenCM9.04-C Controller (included in the Metabot kit)
- A Raspberry Pi board
- A WiFi dongle
- A camera module for Raspberry Pi
- A battery to power the Raspberry Pi board
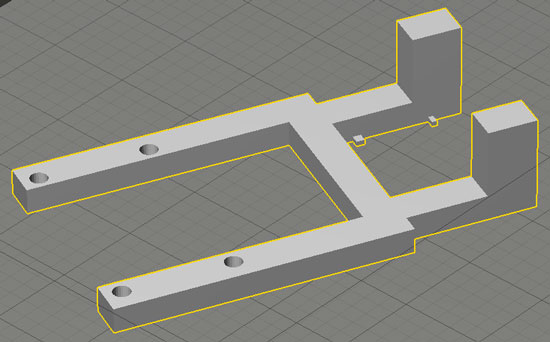
- A 3D printed structural part , to hold the camera module tightly
The main part: the OpenCM9.04-C Controller
Before we start, a few words about the OpenCM9.04-C Controller. The role of this embedded board developed by Robotis is to control the XL-320 servomotors , included in your Metabot set.
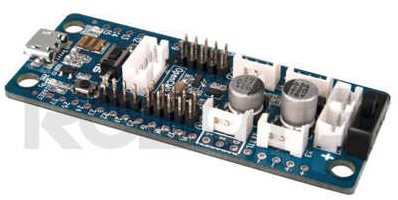
You will need to flash this controller with the firmware , it will then appear as a serial device waiting for instructions.
Assemble your setup with the Metabot
Step 1: you will first have to 3D print a small part, which will be used as a support for the camera module. You can find the STL files here .
Step 2: fasten the camera module to this 3D printed part like shown in the below picture. We used wire for that purpose.
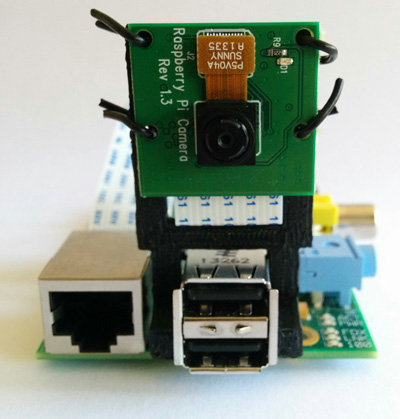
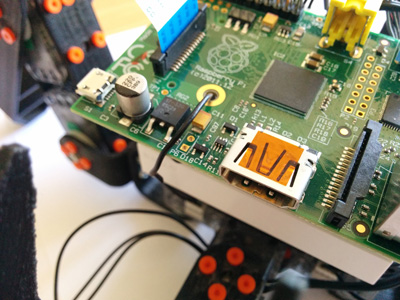
Step 3: tightly fix the Raspberry Pi board on the Metabot robot. Again, we used wires, that we passed through the Raspberry Pi board and OLLO plate holes. Removing the Metabot bluetooth module gives more stability to your set up. We also used wires for this step.
Step 4: now there is just the battery to add on the controller, right next to the Raspberry Pi board. Be careful to position it in the middle, in order not to modify the robot gravity center.

List of the commands available with the openCM9 controller
Connect your Metabot OpenCM9.04-C controller to your computer. In a program such as
Minicom
or
Putty
, type the command
help
in order to get the list of all the different commands that are available to you.
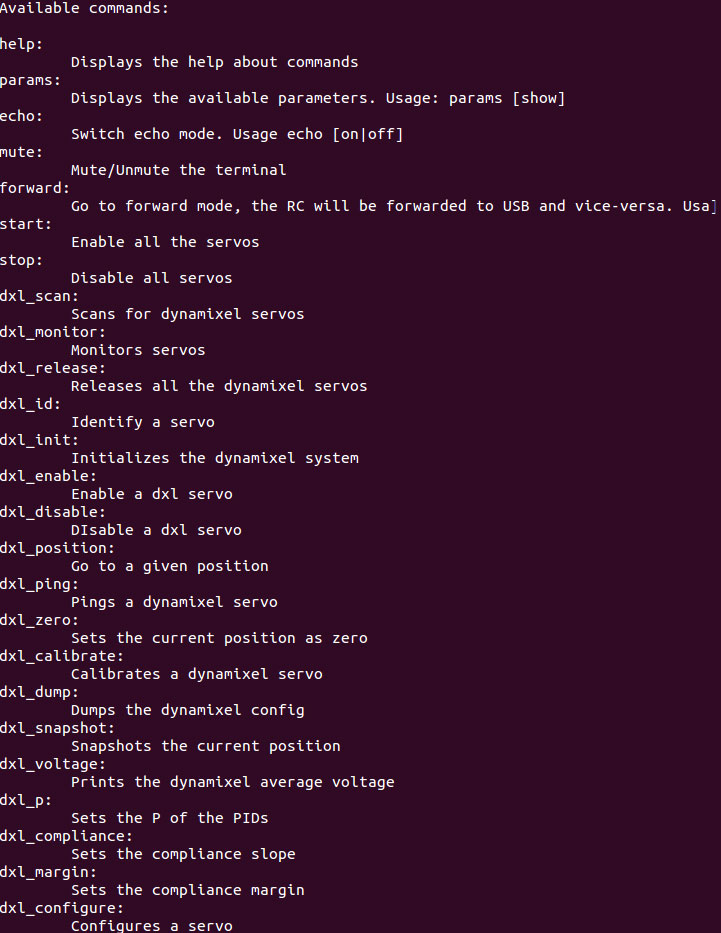
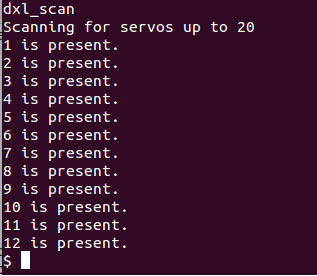
For instance, the
dxl_scan
command will display the IDs list of the servomotors connected to the controller.
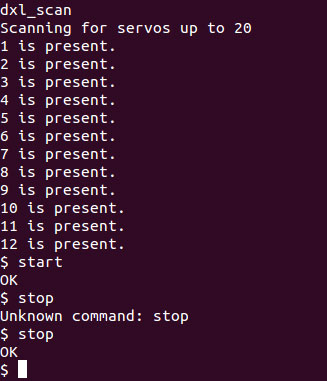
With the
start
command, you can set up the
enable
mode of your servomotors (with torque), and the stop command activate the
disable
mode (without torque).
Thanks to the
dx 50
,command, your Metabot will move in a straight line, at 50 mm/step speed. The
turn 20
command will make it turn at a 20°/step angle.
Metabot + Raspberry Pi: more freedom!
To truly set your Metabot free and be able to control it without a computer, we replaced it with a Raspberry Pi board. We also added a WiFi to set up a video stream from the camera module, so you’ll be able to see through the eyes of your legged robot!
Now you can send your robot exploring your office or your lab, or even discovering the outside world!
Set up the video stream
First off, you need to download the following resources to properly set up this video stream. Avant toute chose, vous devez télécharger ces ressources, qui vous seront nécessaire pour mettre en place le flux vidéo. This folder will have to be downloaded on both your PC and your Raspberry Pi.
Step 1: type the following command in your terminal to get these resources:
    sh


    $ git clone url_to_provide
This will clone the demo directory.
In the folder you just downloaded, you will find 2 sub-folders:
- Sub-folder 1: pc (with all the necessary scripts for your PC)
- Sub-folder 2: rpi (with the install scripts, and the scripts you will need to run the program)
Step 2: launch the install process on your PC:
    sh


    $ cd meta_drive/pc


    $ bash install.sh
This will install
gstreamer
, which is the program you will need to effectively get the video stream from the camera module for Raspberry Pi.
Step 3: browse in the rpi folder (sub-folder 2) and launch the set up:
    sh


    $ cd meta_drive/rpi


    $ bash install.sh
Once the 2 set ups are complete, it is time to test the program!
Step 4: you first need to see if the video stream is working correctly. Type the following command in the Raspberry Pi terminal:
    sh


    $ bash gstLaunch.sh ADDRESSE_IP_DU_PI
This is the command you need to type if you want to know your Raspberry Pi IP address:
    sh


    $ ifconfig
Once the script is running, start the client (computer side) with this command:
    sh


    $ bash meta_drive/pc/gstClient.sh
If you already are in the PC sub-folder, you will just have type this to run the script:
    sh


    $ bash gstClient.sh
If the video stream runs properly, you should now see what the camera module is filming.
If everything went smoothly, you can now sne your Metabot in the open and follow its adventures as they unfold!
Run the
launcher
on your Raspberry Pi:
    sh


    $ cd meta_drive/rpi/


    $ bash launch.sh IP_RPI
Then your PC:
    sh


    $ cd meta_drive/pc/


    $ bash launch.sh IP_RPI
And the adventure begins!
To control your Metabot, the easiest is to download this free app for your android device on the Google Play Store. It can also be controlled with a Bluetooth controller.